When I first started playing with pfSense I was using an old PC I had kicking around as a test ground. Once I got over some annoying hurdles with HA Proxy and Acme Certificates I opted to go all-on on setting up a ‘real’ firewall appliance.
Backup
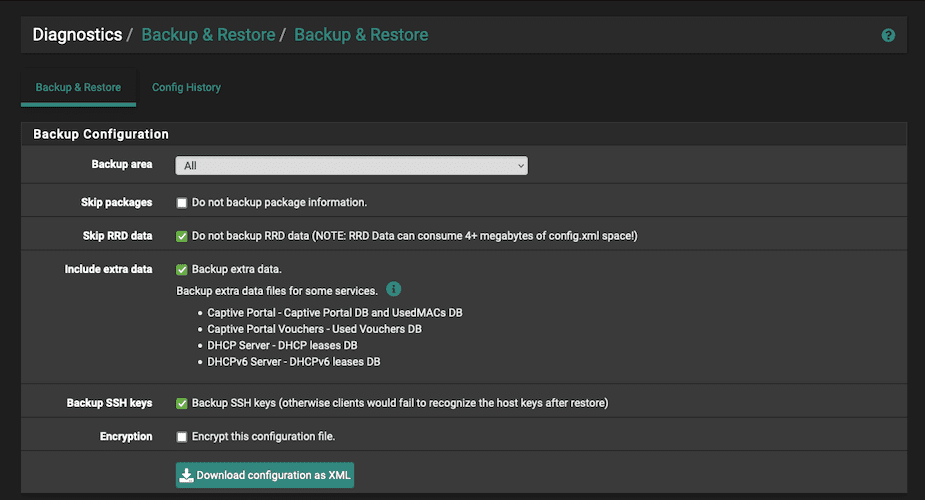
The backup procedure is pretty simple. From the Diagnostics menu choose Backup & Restore. I left the defaults for everything, except I also enabled Include extra data since I’m still playing with my network; I wanted to make sure the DHCP leases were carried over in case I had some stray devices I hadn’t yet assigned a static IP so they wouldn’t stop working.
You can encrypt the backup .xml file if you want, but be aware that you won’t be able to manually edit it if you need to tweak it.
Restoring
Restore the config backup from the same Diagnostics > Backup & Restore page – from here you can upload your saved config .xml file. Click Restore Configuration to kick off the restore.

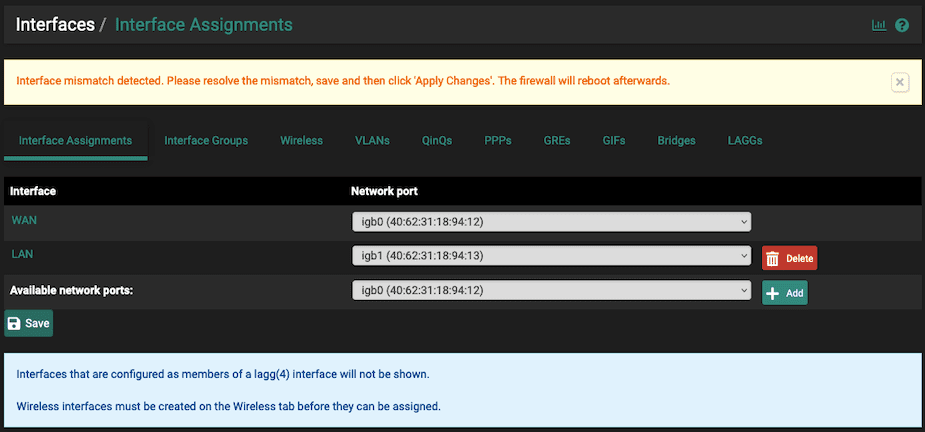
If you are switching to new hardware, like I did, you’ll have to tweak the network interfaces. This is pretty easy because you’re presented with a list of possible options and you just have to choose the interfaces to match you WAN, LAN, and any vlans you need to set up.
Be Patient
While the whole thing when smoothly, I really thought it was going to fail because it took a lot longer than I expected. In my case, it took about 30 mins from start to finish. To put that in context, I have very few rules, I’m using Dynamic DNS to update a couple of records on Cloudflare, and I have a couple of proxy pass-throughs using Acme Certificates and HA Proxy.
Once my backup was restored I had to repeat the above step and re-select the WAN and LAN interfaces and then reboot.

